prisma-binding 到 SDL-first
總覽
本升級指南說明如何遷移基於 Prisma 1 並使用 prisma-binding 實作 GraphQL 伺服器的 Node.js 專案。
程式碼將保留 SDL-first 方法 來建構 GraphQL schema。從 prisma-binding 遷移到 Prisma Client 時,主要差異在於 info 物件無法再用於自動解析關聯,您需要實作類型解析器以確保關聯能正確解析。
本指南假設您已完成升級 Prisma ORM 層的指南。這表示您已
- 安裝 Prisma ORM 2 CLI
- 建立您的 Prisma ORM 2 schema
- 內省您的資料庫並解決潛在的 schema 不相容性
- 安裝並產生 Prisma Client
本指南進一步假設您具有類似於此的檔案設定
.
├── README.md
├── package.json
├── prisma
│   └── schema.prisma
├── prisma1
│   ├── datamodel.prisma
│   └── prisma.yml
└── src
    ├── generated
    │   └── prisma.graphql
    ├── index.js
    └── schema.graphql
重要的部分是
- 一個名為
prisma的資料夾,其中包含您的 Prisma ORM 2 schema - 一個名為
src的資料夾,其中包含您的應用程式碼和一個名為schema.graphql的 schema
如果您的專案結構與此不同,則需要調整指南中的指示以符合您自己的設定。
1. 調整您的 GraphQL schema
使用 prisma-binding,您定義 GraphQL schema(有時稱為應用程式 schema)的方法是基於匯入從產生的 prisma.graphql 檔案(在 Prisma 1 中,這通常稱為Prisma GraphQL schema)中的 GraphQL 類型。這些類型反映了您 Prisma 1 資料模型中的類型,並作為您的 GraphQL API 的基礎。
使用 Prisma ORM 2,不再有您可以匯入的 prisma.graphql 檔案。因此,您必須直接在 schema.graphql 檔案中明確寫出 GraphQL schema 的所有類型。
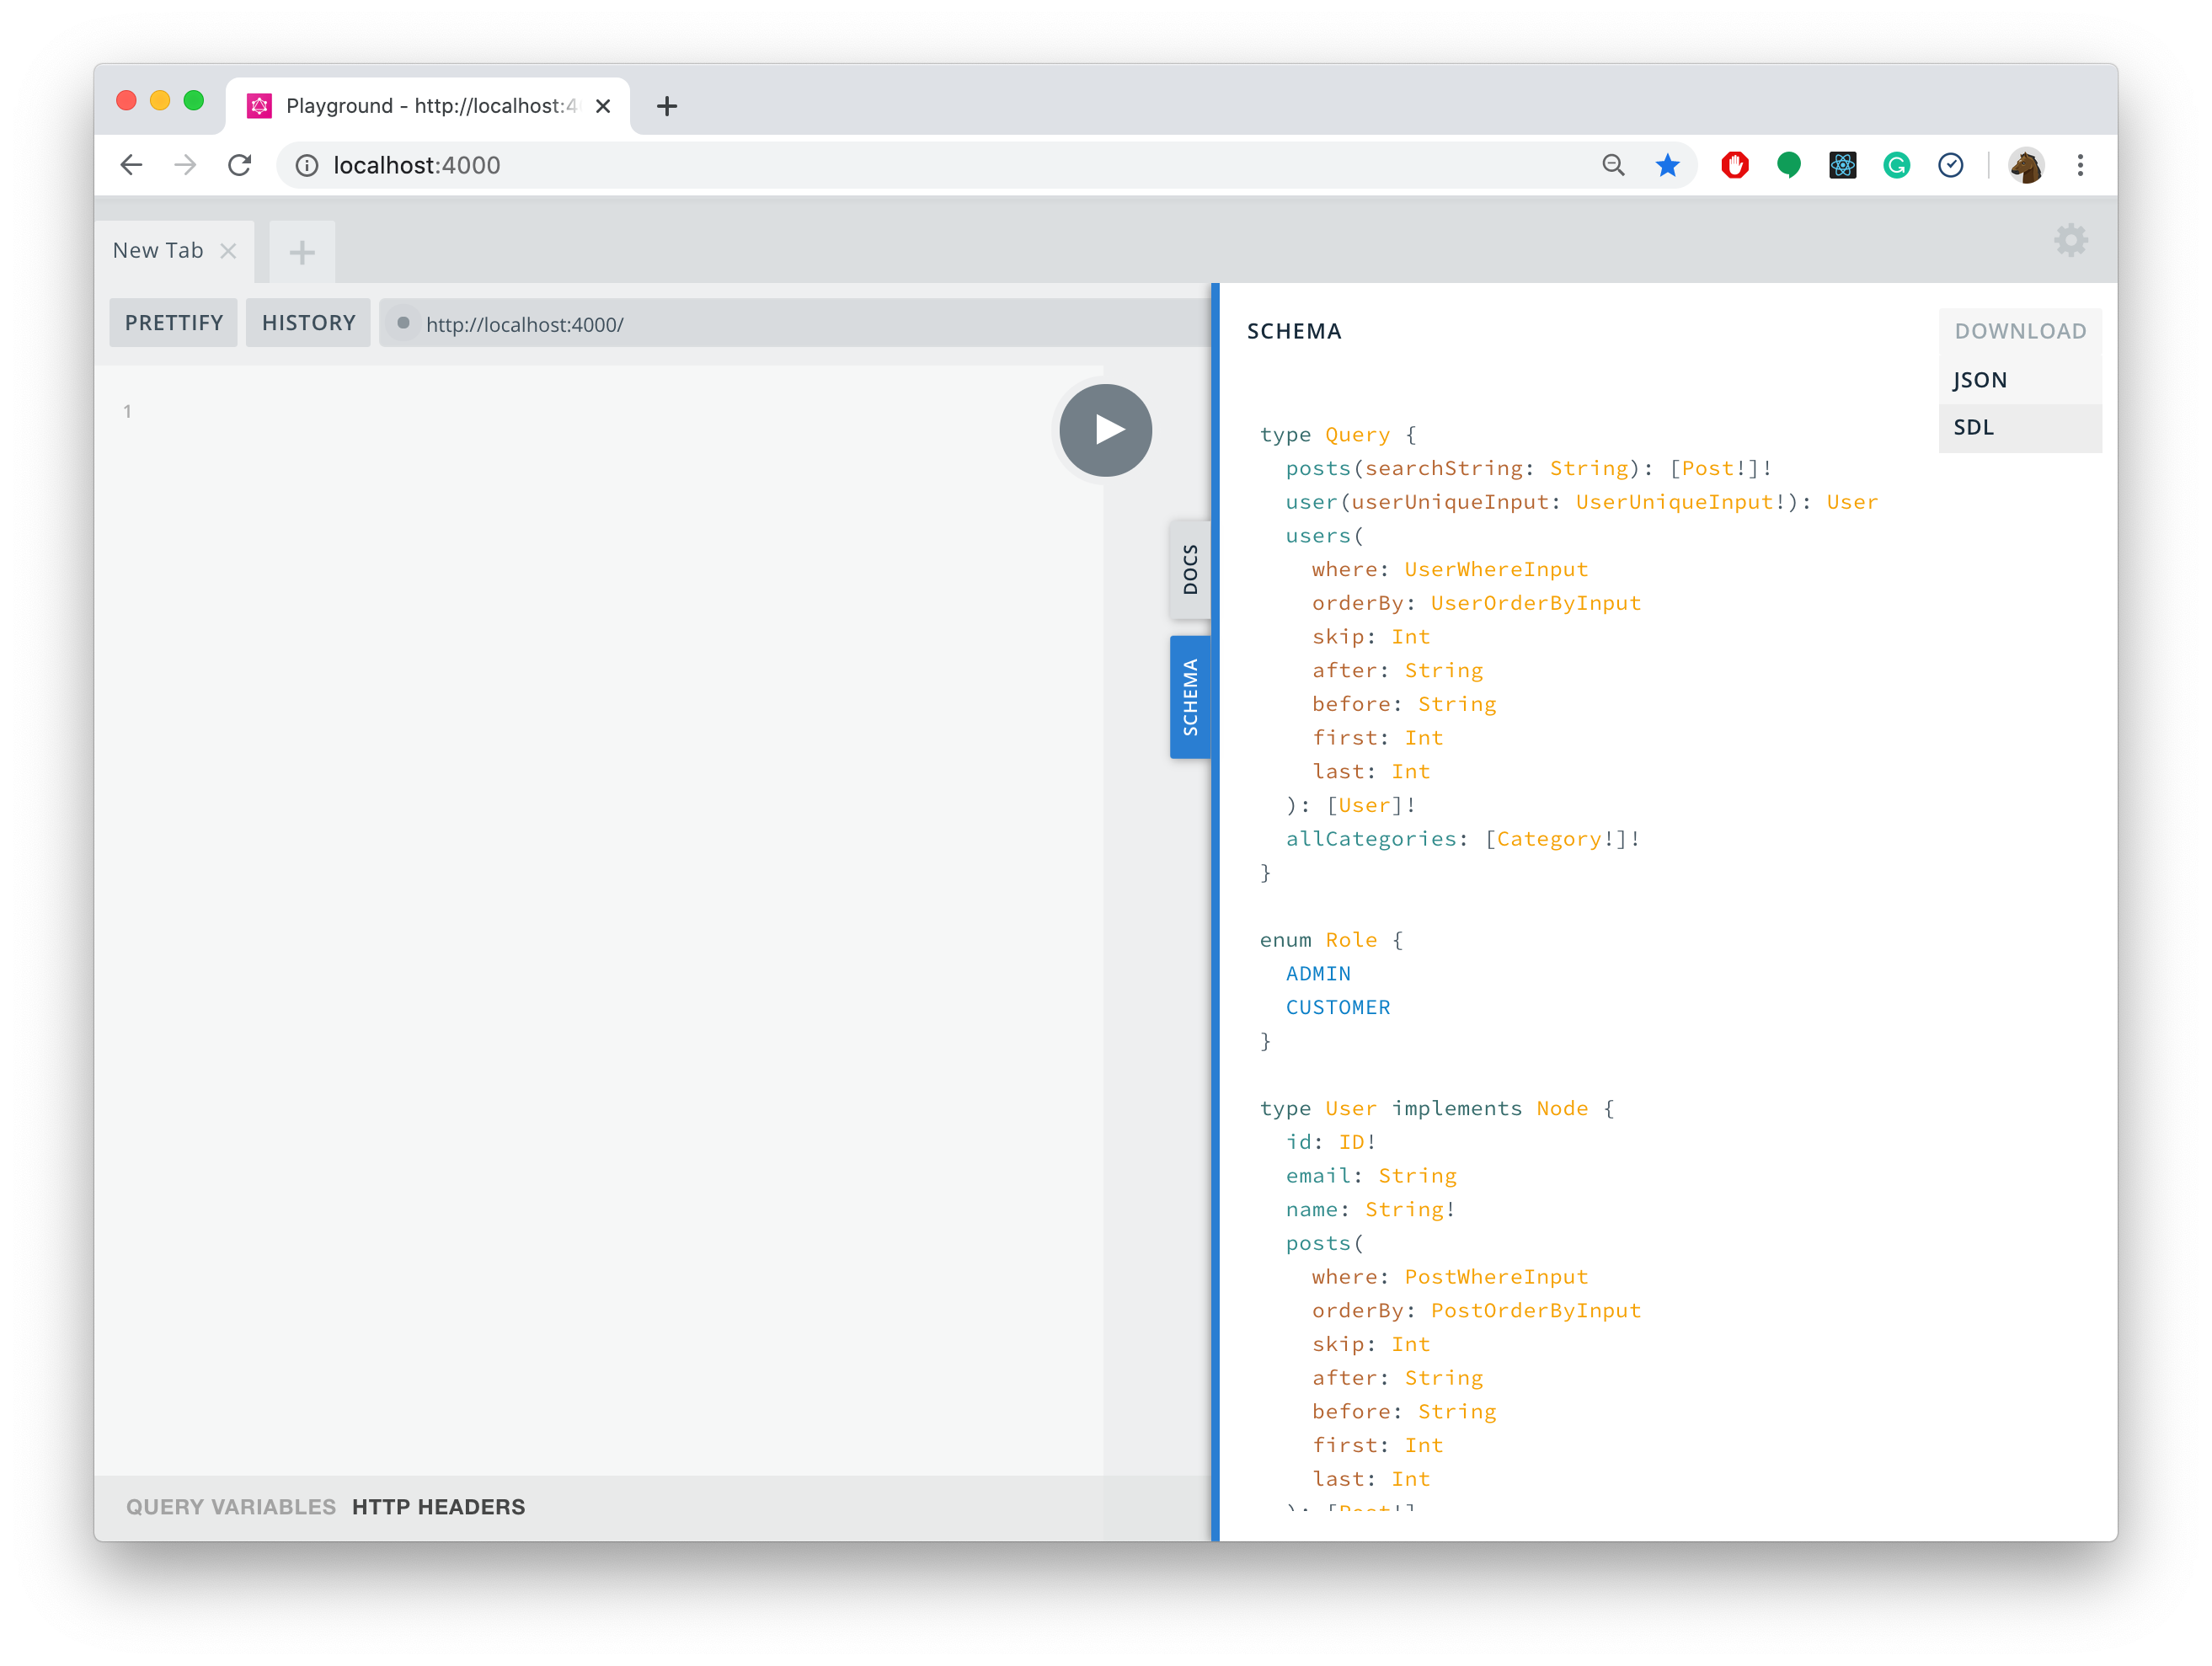
最簡單的方法是從 GraphQL Playground 下載完整的 GraphQL schema。為此,開啟 SCHEMA 標籤,然後按一下右上角的 DOWNLOAD 按鈕,然後選取 SDL
或者,您可以使用 GraphQL CLI 的 get-schema 命令來下載您的完整 schema
npx graphql get-schema --endpoint __GRAPHQL_YOGA_ENDPOINT__ --output schema.graphql --no-all
注意:使用上述命令,您需要將
__GRAPHQL_YOGA_ENDPOINT__佔位符替換為您的 GraphQL Yoga 伺服器的實際端點。
取得 schema.graphql 檔案後,將 src/schema.graphql 中的目前版本替換為新內容。請注意,這兩個 schema 是 100% 等效的,只是新的 schema 沒有使用 graphql-import 從不同的檔案匯入類型。相反地,它在單一檔案中明確寫出所有類型。
以下是我們將在本指南中遷移的範例 GraphQL schema 的這兩個版本的比較(您可以使用標籤在兩個版本之間切換)
- 之前 (使用 graphql-import)
- 之後 (使用 Prisma 2)
# import Post from './generated/prisma.graphql'
# import User from './generated/prisma.graphql'
# import Category from './generated/prisma.graphql'

type Query {
  posts(searchString: String): [Post!]!
  user(userUniqueInput: UserUniqueInput!): User
  users(where: UserWhereInput, orderBy: Enumerable<UserOrderByInput>, skip: Int, after: String, before: String, first: Int, last: Int): [User]!
  allCategories: [Category!]!
}

input UserUniqueInput {
  id: String
  email: String
}

type Mutation {
  createDraft(authorId: ID!, title: String!, content: String!): Post
  publish(id: ID!): Post
  deletePost(id: ID!): Post
  signup(name: String!, email: String!): User!
  updateBio(userId: String!, bio: String!): User
  addPostToCategories(postId: String!, categoryIds: [String!]!): Post
}
type Query {
  posts(searchString: String): [Post!]!
  user(id: ID!): User
  users(where: UserWhereInput, orderBy: Enumerable<UserOrderByInput>, skip: Int, after: String, before: String, first: Int, last: Int): [User]!
  allCategories: [Category!]!
}

type Category implements Node {
  id: ID!
  name: String!
  posts(where: PostWhereInput, orderBy: Enumerable<PostOrderByInput>, skip: Int, after: String, before: String, first: Int, last: Int): [Post!]
}

input CategoryCreateManyWithoutPostsInput {
  create: [CategoryCreateWithoutPostsInput!]
  connect: [CategoryWhereUniqueInput!]
}

input CategoryCreateWithoutPostsInput {
  id: ID
  name: String!
}

enum CategoryOrderByInput {
  id_ASC
  id_DESC
  name_ASC
  name_DESC
}

input CategoryWhereInput {
  """Logical AND on all given filters."""
  AND: [CategoryWhereInput!]

  """Logical OR on all given filters."""
  OR: [CategoryWhereInput!]

  """Logical NOT on all given filters combined by AND."""
  NOT: [CategoryWhereInput!]
  id: ID

  """All values that are not equal to given value."""
  id_not: ID

  """All values that are contained in given list."""
  id_in: [ID!]

  """All values that are not contained in given list."""
  id_not_in: [ID!]

  """All values less than the given value."""
  id_lt: ID

  """All values less than or equal the given value."""
  id_lte: ID

  """All values greater than the given value."""
  id_gt: ID

  """All values greater than or equal the given value."""
  id_gte: ID

  """All values containing the given string."""
  id_contains: ID

  """All values not containing the given string."""
  id_not_contains: ID

  """All values starting with the given string."""
  id_starts_with: ID

  """All values not starting with the given string."""
  id_not_starts_with: ID

  """All values ending with the given string."""
  id_ends_with: ID

  """All values not ending with the given string."""
  id_not_ends_with: ID
  name: String

  """All values that are not equal to given value."""
  name_not: String

  """All values that are contained in given list."""
  name_in: [String!]

  """All values that are not contained in given list."""
  name_not_in: [String!]

  """All values less than the given value."""
  name_lt: String

  """All values less than or equal the given value."""
  name_lte: String

  """All values greater than the given value."""
  name_gt: String

  """All values greater than or equal the given value."""
  name_gte: String

  """All values containing the given string."""
  name_contains: String

  """All values not containing the given string."""
  name_not_contains: String

  """All values starting with the given string."""
  name_starts_with: String

  """All values not starting with the given string."""
  name_not_starts_with: String

  """All values ending with the given string."""
  name_ends_with: String

  """All values not ending with the given string."""
  name_not_ends_with: String
  posts_every: PostWhereInput
  posts_some: PostWhereInput
  posts_none: PostWhereInput
}

input CategoryWhereUniqueInput {
  id: ID
}

scalar DateTime

"""Raw JSON value"""
scalar Json

"""An object with an ID"""
interface Node {
  """The id of the object."""
  id: ID!
}

type Post implements Node {
  id: ID!
  createdAt: DateTime!
  updatedAt: DateTime!
  title: String!
  content: String
  published: Boolean!
  author: User
  categories(where: CategoryWhereInput, orderBy: Enumerable<CategoryOrderByInput>, skip: Int, after: String, before: String, first: Int, last: Int): [Category!]
}

input PostCreateManyWithoutAuthorInput {
  create: [PostCreateWithoutAuthorInput!]
  connect: [PostWhereUniqueInput!]
}

input PostCreateWithoutAuthorInput {
  id: ID
  title: String!
  content: String
  published: Boolean
  categories: CategoryCreateManyWithoutPostsInput
}

enum PostOrderByInput {
  id_ASC
  id_DESC
  createdAt_ASC
  createdAt_DESC
  updatedAt_ASC
  updatedAt_DESC
  title_ASC
  title_DESC
  content_ASC
  content_DESC
  published_ASC
  published_DESC
}

input PostWhereInput {
  """Logical AND on all given filters."""
  AND: [PostWhereInput!]

  """Logical OR on all given filters."""
  OR: [PostWhereInput!]

  """Logical NOT on all given filters combined by AND."""
  NOT: [PostWhereInput!]
  id: ID

  """All values that are not equal to given value."""
  id_not: ID

  """All values that are contained in given list."""
  id_in: [ID!]

  """All values that are not contained in given list."""
  id_not_in: [ID!]

  """All values less than the given value."""
  id_lt: ID

  """All values less than or equal the given value."""
  id_lte: ID

  """All values greater than the given value."""
  id_gt: ID

  """All values greater than or equal the given value."""
  id_gte: ID

  """All values containing the given string."""
  id_contains: ID

  """All values not containing the given string."""
  id_not_contains: ID

  """All values starting with the given string."""
  id_starts_with: ID

  """All values not starting with the given string."""
  id_not_starts_with: ID

  """All values ending with the given string."""
  id_ends_with: ID

  """All values not ending with the given string."""
  id_not_ends_with: ID
  createdAt: DateTime

  """All values that are not equal to given value."""
  createdAt_not: DateTime

  """All values that are contained in given list."""
  createdAt_in: [DateTime!]

  """All values that are not contained in given list."""
  createdAt_not_in: [DateTime!]

  """All values less than the given value."""
  createdAt_lt: DateTime

  """All values less than or equal the given value."""
  createdAt_lte: DateTime

  """All values greater than the given value."""
  createdAt_gt: DateTime

  """All values greater than or equal the given value."""
  createdAt_gte: DateTime
  updatedAt: DateTime

  """All values that are not equal to given value."""
  updatedAt_not: DateTime

  """All values that are contained in given list."""
  updatedAt_in: [DateTime!]

  """All values that are not contained in given list."""
  updatedAt_not_in: [DateTime!]

  """All values less than the given value."""
  updatedAt_lt: DateTime

  """All values less than or equal the given value."""
  updatedAt_lte: DateTime

  """All values greater than the given value."""
  updatedAt_gt: DateTime

  """All values greater than or equal the given value."""
  updatedAt_gte: DateTime
  title: String

  """All values that are not equal to given value."""
  title_not: String

  """All values that are contained in given list."""
  title_in: [String!]

  """All values that are not contained in given list."""
  title_not_in: [String!]

  """All values less than the given value."""
  title_lt: String

  """All values less than or equal the given value."""
  title_lte: String

  """All values greater than the given value."""
  title_gt: String

  """All values greater than or equal the given value."""
  title_gte: String

  """All values containing the given string."""
  title_contains: String

  """All values not containing the given string."""
  title_not_contains: String

  """All values starting with the given string."""
  title_starts_with: String

  """All values not starting with the given string."""
  title_not_starts_with: String

  """All values ending with the given string."""
  title_ends_with: String

  """All values not ending with the given string."""
  title_not_ends_with: String
  content: String

  """All values that are not equal to given value."""
  content_not: String

  """All values that are contained in given list."""
  content_in: [String!]

  """All values that are not contained in given list."""
  content_not_in: [String!]

  """All values less than the given value."""
  content_lt: String

  """All values less than or equal the given value."""
  content_lte: String

  """All values greater than the given value."""
  content_gt: String

  """All values greater than or equal the given value."""
  content_gte: String

  """All values containing the given string."""
  content_contains: String

  """All values not containing the given string."""
  content_not_contains: String

  """All values starting with the given string."""
  content_starts_with: String

  """All values not starting with the given string."""
  content_not_starts_with: String

  """All values ending with the given string."""
  content_ends_with: String

  """All values not ending with the given string."""
  content_not_ends_with: String
  published: Boolean

  """All values that are not equal to given value."""
  published_not: Boolean
  author: UserWhereInput
  categories_every: CategoryWhereInput
  categories_some: CategoryWhereInput
  categories_none: CategoryWhereInput
}

input PostWhereUniqueInput {
  id: ID
}

type Profile implements Node {
  id: ID!
  bio: String
  user: User!
}

input ProfileCreateOneWithoutUserInput {
  create: ProfileCreateWithoutUserInput
  connect: ProfileWhereUniqueInput
}

input ProfileCreateWithoutUserInput {
  id: ID
  bio: String
}

input ProfileWhereInput {
  """Logical AND on all given filters."""
  AND: [ProfileWhereInput!]

  """Logical OR on all given filters."""
  OR: [ProfileWhereInput!]

  """Logical NOT on all given filters combined by AND."""
  NOT: [ProfileWhereInput!]
  id: ID

  """All values that are not equal to given value."""
  id_not: ID

  """All values that are contained in given list."""
  id_in: [ID!]

  """All values that are not contained in given list."""
  id_not_in: [ID!]

  """All values less than the given value."""
  id_lt: ID

  """All values less than or equal the given value."""
  id_lte: ID

  """All values greater than the given value."""
  id_gt: ID

  """All values greater than or equal the given value."""
  id_gte: ID

  """All values containing the given string."""
  id_contains: ID

  """All values not containing the given string."""
  id_not_contains: ID

  """All values starting with the given string."""
  id_starts_with: ID

  """All values not starting with the given string."""
  id_not_starts_with: ID

  """All values ending with the given string."""
  id_ends_with: ID

  """All values not ending with the given string."""
  id_not_ends_with: ID
  bio: String

  """All values that are not equal to given value."""
  bio_not: String

  """All values that are contained in given list."""
  bio_in: [String!]

  """All values that are not contained in given list."""
  bio_not_in: [String!]

  """All values less than the given value."""
  bio_lt: String

  """All values less than or equal the given value."""
  bio_lte: String

  """All values greater than the given value."""
  bio_gt: String

  """All values greater than or equal the given value."""
  bio_gte: String

  """All values containing the given string."""
  bio_contains: String

  """All values not containing the given string."""
  bio_not_contains: String

  """All values starting with the given string."""
  bio_starts_with: String

  """All values not starting with the given string."""
  bio_not_starts_with: String

  """All values ending with the given string."""
  bio_ends_with: String

  """All values not ending with the given string."""
  bio_not_ends_with: String
  user: UserWhereInput
}

input ProfileWhereUniqueInput {
  id: ID
}

enum Role {
  ADMIN
  CUSTOMER
}

type User implements Node {
  id: ID!
  email: String
  name: String!
  posts(where: PostWhereInput, orderBy: Enumerable<PostOrderByInput>, skip: Int, after: String, before: String, first: Int, last: Int): [Post!]
  role: Role!
  profile: Profile
  jsonData: Json
}

input UserCreateInput {
  id: ID
  email: String
  name: String!
  role: Role
  jsonData: Json
  posts: PostCreateManyWithoutAuthorInput
  profile: ProfileCreateOneWithoutUserInput
}

enum UserOrderByInput {
  id_ASC
  id_DESC
  email_ASC
  email_DESC
  name_ASC
  name_DESC
  role_ASC
  role_DESC
  jsonData_ASC
  jsonData_DESC
}

input UserWhereInput {
  """Logical AND on all given filters."""
  AND: [UserWhereInput!]

  """Logical OR on all given filters."""
  OR: [UserWhereInput!]

  """Logical NOT on all given filters combined by AND."""
  NOT: [UserWhereInput!]
  id: ID

  """All values that are not equal to given value."""
  id_not: ID

  """All values that are contained in given list."""
  id_in: [ID!]

  """All values that are not contained in given list."""
  id_not_in: [ID!]

  """All values less than the given value."""
  id_lt: ID

  """All values less than or equal the given value."""
  id_lte: ID

  """All values greater than the given value."""
  id_gt: ID

  """All values greater than or equal the given value."""
  id_gte: ID

  """All values containing the given string."""
  id_contains: ID

  """All values not containing the given string."""
  id_not_contains: ID

  """All values starting with the given string."""
  id_starts_with: ID

  """All values not starting with the given string."""
  id_not_starts_with: ID

  """All values ending with the given string."""
  id_ends_with: ID

  """All values not ending with the given string."""
  id_not_ends_with: ID
  email: String

  """All values that are not equal to given value."""
  email_not: String

  """All values that are contained in given list."""
  email_in: [String!]

  """All values that are not contained in given list."""
  email_not_in: [String!]

  """All values less than the given value."""
  email_lt: String

  """All values less than or equal the given value."""
  email_lte: String

  """All values greater than the given value."""
  email_gt: String

  """All values greater than or equal the given value."""
  email_gte: String

  """All values containing the given string."""
  email_contains: String

  """All values not containing the given string."""
  email_not_contains: String

  """All values starting with the given string."""
  email_starts_with: String

  """All values not starting with the given string."""
  email_not_starts_with: String

  """All values ending with the given string."""
  email_ends_with: String

  """All values not ending with the given string."""
  email_not_ends_with: String
  name: String

  """All values that are not equal to given value."""
  name_not: String

  """All values that are contained in given list."""
  name_in: [String!]

  """All values that are not contained in given list."""
  name_not_in: [String!]

  """All values less than the given value."""
  name_lt: String

  """All values less than or equal the given value."""
  name_lte: String

  """All values greater than the given value."""
  name_gt: String

  """All values greater than or equal the given value."""
  name_gte: String

  """All values containing the given string."""
  name_contains: String

  """All values not containing the given string."""
  name_not_contains: String

  """All values starting with the given string."""
  name_starts_with: String

  """All values not starting with the given string."""
  name_not_starts_with: String

  """All values ending with the given string."""
  name_ends_with: String

  """All values not ending with the given string."""
  name_not_ends_with: String
  role: Role

  """All values that are not equal to given value."""
  role_not: Role

  """All values that are contained in given list."""
  role_in: [Role!]

  """All values that are not contained in given list."""
  role_not_in: [Role!]
  posts_every: PostWhereInput
  posts_some: PostWhereInput
  posts_none: PostWhereInput
  profile: ProfileWhereInput
}
您會注意到,新版本的 GraphQL schema 不僅定義了直接匯入的模型,還定義了之前 schema 中不存在的其他類型(例如 input 類型)。
2. 設定您的 PrismaClient 實例
PrismaClient 是您在 Prisma ORM 2 中與資料庫互動的新介面。它讓您能調用各種方法來建構 SQL 查詢並將其傳送到資料庫,並以純 JavaScript 物件的形式傳回結果。
PrismaClient 查詢 API 的靈感來自最初的 prisma-binding API,因此您使用 Prisma Client 發送的許多查詢會感到熟悉。
與 Prisma 1 中的 prisma-binding 實例類似,您也希望將 Prisma ORM 2 的 PrismaClient 附加到 GraphQL 的 context,以便可以在您的解析器內部存取它
const { PrismaClient } = require('@prisma/client')

// ...

const server = new GraphQLServer({
  typeDefs: 'src/schema.graphql',
  resolvers,
  context: (req) => ({
    ...req,
    prisma: new Prisma({
      typeDefs: 'src/generated/prisma.graphql',
      endpoint: 'https://127.0.0.1:4466',
    }),
    prisma: new PrismaClient(),
  }),
})
在上面的程式碼區塊中,紅色線條是要從您目前的設定中移除的行,綠色線條是您應該新增的行。當然,您先前的設定可能與此不同(例如,如果您在生產環境中執行 API,您的 Prisma ORM endpoint 不太可能是 https://127.0.0.1:4466),這只是一個範例,用於指示它可能看起來的樣子。
當您現在在解析器內部存取 context.prisma 時,您現在可以存取 Prisma Client 查詢。
2. 編寫您的 GraphQL 類型解析器
prisma-binding 能夠神奇地解析您的 GraphQL schema 中的關聯。但是,當不使用 prisma-binding 時,您需要使用所謂的類型解析器來明確解析您的關聯。
注意 您可以在這篇文章中了解更多關於類型解析器的概念以及為什麼它們是必要的:GraphQL 伺服器基礎知識:GraphQL Schema、TypeDefs 和解析器說明
2.1. 實作 User 類型的類型解析器
範例 GraphQL schema 中的 User 類型定義如下
type User implements Node {
  id: ID!
  email: String
  name: String!
  posts(
    where: PostWhereInput
    orderBy: Enumerable<PostOrderByInput>
    skip: Int
    after: String
    before: String
    first: Int
    last: Int
  ): [Post!]
  role: Role!
  profile: Profile
  jsonData: Json
}
此類型有兩個關聯
posts欄位表示與Post的一對多關聯profile欄位表示與Profile的一對一關聯
由於您不再使用 prisma-binding,您現在需要在類型解析器中「手動」解析這些關聯。
您可以透過將 User 欄位新增到您的解析器映射並實作 posts 和 profile 關聯的解析器來完成此操作,如下所示
const resolvers = {
  Query: {
    // ... your query resolvers
  },
  Mutation: {
    // ... your mutation resolvers
  },
  User: {
    posts: (parent, args, context) => {
      return context.prisma.user
        .findUnique({
          where: { id: parent.id },
        })
        .posts()
    },
    profile: (parent, args, context) => {
      return context.prisma.user
        .findUnique({
          where: { id: parent.id },
        })
        .profile()
    },
  },
}
在這些解析器內部,您正在使用新的 PrismaClient 對資料庫執行查詢。在 posts 解析器內部,資料庫查詢從指定的 author(其 id 位於 parent 物件中)載入所有 Post 記錄。在 profile 解析器內部,資料庫查詢從指定的 user(其 id 位於 parent 物件中)載入 Profile 記錄。
感謝這些額外的解析器,當您在查詢中請求有關 User 類型的資訊時,您現在將能夠在 GraphQL 查詢/mutation 中巢狀關聯,例如
{
  users {
    id
    name
    posts {
      # fetching this relation is enabled by the new type resolver
      id
      title
    }
    profile {
      # fetching this relation is enabled by the new type resolver
      id
      bio
    }
  }
}
2.2. 實作 Post 類型的類型解析器
範例 GraphQL schema 中的 Post 類型定義如下
type Post implements Node {
  id: ID!
  createdAt: DateTime!
  updatedAt: DateTime!
  title: String!
  content: String
  published: Boolean!
  author: User
  categories(
    where: CategoryWhereInput
    orderBy: Enumerable<CategoryOrderByInput>
    skip: Int
    after: String
    before: String
    first: Int
    last: Int
  ): [Category!]
}
此類型有兩個關聯
author欄位表示與User的一對多關聯categories欄位表示與Category的多對多關聯
由於您不再使用 prisma-binding,您現在需要在類型解析器中「手動」解析這些關聯。
您可以透過將 Post 欄位新增到您的解析器映射並實作 author 和 categories 關聯的解析器來完成此操作,如下所示
const resolvers = {
  Query: {
    // ... your query resolvers
  },
  Mutation: {
    // ... your mutation resolvers
  },
  User: {
    // ... your type resolvers for `User` from before
  },
  Post: {
    author: (parent, args, context) => {
      return context.prisma.post
        .findUnique({
          where: { id: parent.id },
        })
        .author()
    },
    categories: (parent, args, context) => {
      return context.prisma.post
        .findUnique({
          where: { id: parent.id },
        })
        .categories()
    },
  },
}
在這些解析器內部,您正在使用新的 PrismaClient 對資料庫執行查詢。在 author 解析器內部,資料庫查詢載入代表 Post 的 author 的 User 記錄。在 categories 解析器內部,資料庫查詢從指定的 post(其 id 位於 parent 物件中)載入所有 Category 記錄。
感謝這些額外的解析器,當您在查詢中請求有關 User 類型的資訊時,您現在將能夠在 GraphQL 查詢/mutation 中巢狀關聯,例如
{
  posts {
    id
    title
    author {
      # fetching this relation is enabled by the new type resolver
      id
      name
    }
    categories {
      # fetching this relation is enabled by the new type resolver
      id
      name
    }
  }
}
2.3. 實作 Profile 類型的類型解析器
範例 GraphQL schema 中的 Profile 類型定義如下
type Profile implements Node {
  id: ID!
  bio: String
  user: User!
}
此類型有一個關聯:user 欄位表示與 User 的一對多關聯。
由於您不再使用 prisma-binding,您現在需要在類型解析器中「手動」解析此關聯。
您可以透過將 Profile 欄位新增到您的解析器映射並實作 owner 關聯的解析器來完成此操作,如下所示
const resolvers = {
  Query: {
    // ... your query resolvers
  },
  Mutation: {
    // ... your mutation resolvers
  },
  User: {
    // ... your type resolvers for `User` from before
  },
  Post: {
    // ... your type resolvers for `Post` from before
  },
  Profile: {
    user: (parent, args, context) => {
      return context.prisma.profile
        .findUnique({
          where: { id: parent.id },
        })
        .owner()
    },
  },
}
在此解析器內部,您正在使用新的 PrismaClient 對資料庫執行查詢。在 user 解析器內部,資料庫查詢從指定的 profile(其 id 位於 parent 物件中)載入 User 記錄。
感謝此額外的解析器,當您在查詢中請求有關 Profile 類型的資訊時,您現在將能夠在 GraphQL 查詢/mutation 中巢狀關聯。
2.4. 實作 Category 類型的類型解析器
範例 GraphQL schema 中的 Category 類型定義如下
type Category implements Node {
  id: ID!
  name: String!
  posts(
    where: PostWhereInput
    orderBy: Enumerable<PostOrderByInput>
    skip: Int
    after: String
    before: String
    first: Int
    last: Int
  ): [Post!]
}
此類型有一個關聯:posts 欄位表示與 Post 的多對多關聯。
由於您不再使用 prisma-binding,您現在需要在類型解析器中「手動」解析此關聯。
您可以透過將 Category 欄位新增到您的解析器映射並實作 posts 和 profile 關聯的解析器來完成此操作,如下所示
const resolvers = {
  Query: {
    // ... your query resolvers
  },
  Mutation: {
    // ... your mutation resolvers
  },
  User: {
    // ... your type resolvers for `User` from before
  },
  Post: {
    // ... your type resolvers for `Post` from before
  },
  Profile: {
    // ... your type resolvers for `User` from before
  },
  Category: {
    posts: (parent, args, context) => {
      return context.prisma
        .findUnique({
          where: { id: parent.id },
        })
        .posts()
    },
  },
}
在此解析器內部,您正在使用新的 PrismaClient 對資料庫執行查詢。在 posts 解析器內部,資料庫查詢從指定的 categories(其 id 位於 parent 物件中)載入所有 Post 記錄。
感謝此額外的解析器,當您在查詢中請求有關 Category 類型的資訊時,您現在將能夠在 GraphQL 查詢/mutation 中巢狀關聯。
完成所有類型解析器後,您可以開始遷移實際的 GraphQL API 操作。
3. 遷移 GraphQL 操作
3.1. 遷移 GraphQL 查詢
在本節中,您將把所有 GraphQL 查詢從 prisma-binding 遷移到 Prisma Client。
3.1.1. 遷移 users 查詢(使用 forwardTo)
在我們的範例 API 中,範例 GraphQL schema 中的 users 查詢定義和實作如下。
使用 prisma-binding 的 SDL schema 定義
type Query {
  users(where: UserWhereInput, orderBy: Enumerable<UserOrderByInput>, skip: Int, after: String, before: String, first: Int, last: Int): [User]!
  # ... other queries
}
使用 prisma-binding 的解析器實作
const resolvers = {
  Query: {
    users: forwardTo('prisma'),
    // ... other resolvers
  },
}
使用 Prisma Client 實作 users 解析器
要重新實作先前使用 forwardTo 的查詢,其概念是將傳入的篩選、排序和分頁引數傳遞給 PrismaClient
const resolvers = {
  Query: {
    users: (_, args, context, info) => {
      // this doesn't work yet
      const { where, orderBy, skip, first, last, after, before } = args
      return context.prisma.user.findMany({
        where,
        orderBy,
        skip,
        first,
        last,
        after,
        before,
      })
    },
    // ... other resolvers
  },
}
請注意,此方法尚無法運作,因為傳入引數的結構與 PrismaClient 預期的結構不同。為了確保結構相容,您可以使用 @prisma/binding-argument-transform npm 套件,以確保相容性
npm install @prisma/binding-argument-transform
您現在可以如下使用此套件
const {
  makeOrderByPrisma2Compatible,
  makeWherePrisma2Compatible,
} = require('@prisma/binding-argument-transform')

const resolvers = {
  Query: {
    users: (_, args, context, info) => {
      // this still doesn't entirely work
      const { where, orderBy, skip, first, last, after, before } = args
      const prisma2Where = makeWherePrisma2Compatible(where)
      const prisma2OrderBy = makeOrderByPrisma2Compatible(orderBy)
      return context.prisma.user.findMany({
        where: prisma2Where,
        orderBy: prisma2OrderBy,
        skip,
        first,
        last,
        after,
        before,
      })
    },
    // ... other resolvers
  },
}
最後一個剩餘的問題是分頁引數。Prisma ORM 2 引入了新的分頁 API
first、last、before和after引數已移除- 新的
cursor引數取代了before和after - 新的
take引數取代了first和last
以下是如何調整呼叫以使其符合新的 Prisma Client 分頁 API
const {
  makeOrderByPrisma2Compatible,
  makeWherePrisma2Compatible,
} = require('@prisma/binding-argument-transform')

const resolvers = {
  Query: {
    users: (_, args, context) => {
      const { where, orderBy, skip, first, last, after, before } = args
      const prisma2Where = makeWherePrisma2Compatible(where)
      const prisma2OrderBy = makeOrderByPrisma2Compatible(orderBy)
      const skipValue = skip || 0
      const prisma2Skip = Boolean(before) ? skipValue + 1 : skipValue
      const prisma2Take = Boolean(last) ? -last : first
      const prisma2Before = { id: before }
      const prisma2After = { id: after }
      const prisma2Cursor =
        !Boolean(before) && !Boolean(after)
          ? undefined
          : Boolean(before)
          ? prisma2Before
          : prisma2After
      return context.prisma.user.findMany({
        where: prisma2Where,
        orderBy: prisma2OrderBy,
        skip: prisma2Skip,
        cursor: prisma2Cursor,
        take: prisma2Take,
      })
    },
    // ... other resolvers
  },
}
需要進行計算以確保傳入的分頁引數正確地映射到 Prisma Client API 的引數。
3.1.2. 遷移 posts(searchString: String): [Post!]! 查詢
posts 查詢的定義和實作如下。
使用 prisma-binding 的 SDL schema 定義
type Query {
  posts(searchString: String): [Post!]!
  # ... other queries
}
使用 prisma-binding 的解析器實作
const resolvers = {
  Query: {
    posts: (_, args, context, info) => {
      return context.prisma.query.posts(
        {
          where: {
            OR: [
              { title_contains: args.searchString },
              { content_contains: args.searchString },
            ],
          },
        },
        info
      )
    },
    // ... other resolvers
  },
}
使用 Prisma Client 實作 posts 解析器
為了使用新的 Prisma Client 獲得相同的行為,您需要調整您的解析器實作
const resolvers = {
  Query: {
    posts: (_, args, context) => {
      return context.prisma.post.findMany({
        where: {
          OR: [
            { title: { contains: args.searchString } },
            { content: { contains: args.searchString } },
          ],
        },
      })
    },
    // ... other resolvers
  },
}
您現在可以在 GraphQL Playground 中發送各自的查詢
{
  posts {
    id
    title
    author {
      id
      name
    }
  }
}
3.1.3. 遷移 user(uniqueInput: UserUniqueInput): User 查詢
在我們的範例應用程式中,user 查詢的定義和實作如下。
使用 prisma-binding 的 SDL schema 定義
type Query {
  user(userUniqueInput: UserUniqueInput): User
  # ... other queries
}

input UserUniqueInput {
  id: String
  email: String
}
使用 prisma-binding 的解析器實作
const resolvers = {
  Query: {
    user: (_, args, context, info) => {
      return context.prisma.query.user(
        {
          where: args.userUniqueInput,
        },
        info
      )
    },
    // ... other resolvers
  },
}
使用 Prisma Client 實作 user 解析器
為了使用新的 Prisma Client 獲得相同的行為,您需要調整您的解析器實作
const resolvers = {
  Query: {
    user: (_, args, context) => {
      return context.prisma.user.findUnique({
        where: args.userUniqueInput,
      })
    },
    // ... other resolvers
  },
}
您現在可以透過 GraphQL Playground 發送各自的查詢
{
  user(userUniqueInput: { email: "alice@prisma.io" }) {
    id
    name
  }
}
3.1. 遷移 GraphQL mutation
在本節中,您將遷移範例 schema 中的 GraphQL mutation。
3.1.2. 遷移 createUser mutation(使用 forwardTo)
在範例應用程式中,範例 GraphQL schema 中的 createUser mutation 定義和實作如下。
使用 prisma-binding 的 SDL schema 定義
type Mutation {
  createUser(data: UserCreateInput!): User!
  # ... other mutations
}
使用 prisma-binding 的解析器實作
const resolvers = {
  Mutation: {
    createUser: forwardTo('prisma'),
    // ... other resolvers
  },
}
使用 Prisma Client 實作 createUser 解析器
為了使用新的 Prisma Client 獲得相同的行為,您需要調整您的解析器實作
const resolvers = {
  Mutation: {
    createUser: (_, args, context, info) => {
      return context.prisma.user.create({
        data: args.data,
      })
    },
    // ... other resolvers
  },
}
您現在可以針對新的 API 編寫您的第一個 mutation,例如
mutation {
  createUser(data: { name: "Alice", email: "alice@prisma.io" }) {
    id
  }
}
3.1.3. 遷移 createDraft(title: String!, content: String, authorId: String!): Post! 查詢
在範例應用程式中,createDraft mutation 的定義和實作如下。
使用 prisma-binding 的 SDL schema 定義
type Mutation {
  createDraft(title: String!, content: String, authorId: String!): Post!
  # ... other mutations
}
使用 prisma-binding 的解析器實作
const resolvers = {
  Mutation: {
    createDraft: (_, args, context, info) => {
      return context.prisma.mutation.createPost(
        {
          data: {
            title: args.title,
            content: args.content,
            author: {
              connect: {
                id: args.authorId,
              },
            },
          },
        },
        info
      )
    },
    // ... other resolvers
  },
}
使用 Prisma Client 實作 createDraft 解析器
為了使用新的 Prisma Client 獲得相同的行為,您需要調整您的解析器實作
const resolvers = {
  Mutation: {
    createDraft: (_, args, context, info) => {
      return context.prisma.post.create({
        data: {
          title: args.title,
          content: args.content,
          author: {
            connect: {
              id: args.authorId,
            },
          },
        },
      })
    },
    // ... other resolvers
  },
}
您現在可以透過 GraphQL Playground 發送各自的 mutation
mutation {
  createDraft(title: "Hello World", authorId: "__AUTHOR_ID__") {
    id
    published
    author {
      id
      name
    }
  }
}
3.1.4. 遷移 updateBio(bio: String, userUniqueInput: UserUniqueInput!): User mutation
在範例應用程式中,updateBio mutation 的定義和實作如下。
使用 prisma-binding 的 SDL schema 定義
type Mutation {
  updateBio(bio: String!, userUniqueInput: UserUniqueInput!): User
  # ... other mutations
}
使用 prisma-binding 的解析器實作
const resolvers = {
  Mutation: {
    updateBio: (_, args, context, info) => {
      return context.prisma.mutation.updateUser(
        {
          data: {
            profile: {
              update: { bio: args.bio },
            },
          },
          where: { id: args.userId },
        },
        info
      )
    },
    // ... other resolvers
  },
}
使用 Prisma Client 實作 updateBio 解析器
為了使用 Prisma Client 獲得相同的行為,您需要調整您的解析器實作
const resolvers = {
  Mutation: {
    updateBio: (_, args, context, info) => {
      return context.prisma.user.update({
        data: {
          profile: {
            update: { bio: args.bio },
          },
        },
        where: args.userUniqueInput,
      })
    },
    // ... other resolvers
  },
}
您現在可以透過 GraphQL Playground 發送各自的 mutation
mutation {
  updateBio(
    userUniqueInput: { email: "alice@prisma.io" }
    bio: "I like turtles"
  ) {
    id
    name
    profile {
      id
      bio
    }
  }
}
3.1.5. 遷移 addPostToCategories(postId: String!, categoryIds: [String!]!): Post mutation
在範例應用程式中,addPostToCategories mutation 的定義和實作如下。
使用 prisma-binding 的 SDL schema 定義
type Mutation {
  addPostToCategories(postId: String!, categoryIds: [String!]!): Post
  # ... other mutations
}
使用 prisma-binding 的解析器實作
const resolvers = {
  Mutation: {
    addPostToCategories: (_, args, context, info) => {
      const ids = args.categoryIds.map((id) => ({ id }))
      return context.prisma.mutation.updatePost(
        {
          data: {
            categories: {
              connect: ids,
            },
          },
          where: {
            id: args.postId,
          },
        },
        info
      )
    },
    // ... other resolvers
  },
}
使用 Prisma Client 實作 addPostToCategories 解析器
為了使用 Prisma Client 獲得相同的行為,您需要調整您的解析器實作
const resolvers = {
  Mutation: {
    addPostToCategories: (_, args, context, info) => {
      const ids = args.categoryIds.map((id) => ({ id }))
      return context.prisma.post.update({
        where: {
          id: args.postId,
        },
        data: {
          categories: { connect: ids },
        },
      })
    },
    // ... other resolvers
  },
}
您現在可以透過 GraphQL Playground 發送各自的查詢
mutation {
  addPostToCategories(
    postId: "__AUTHOR_ID__"
    categoryIds: ["__CATEGORY_ID_1__", "__CATEGORY_ID_2__"]
  ) {
    id
    title
    categories {
      id
      name
    }
  }
}
4. 清理
由於整個應用程式現在已升級到 Prisma ORM 2,您可以刪除所有不必要的文件並移除不再需要的依賴項。
4.1. 清理 npm 依賴項
您可以從移除與 Prisma 1 設定相關的 npm 依賴項開始
npm uninstall graphql-cli prisma-binding prisma1
4.2. 刪除未使用的文件
接下來,刪除您的 Prisma 1 設定的文件
rm prisma1/datamodel.prisma prisma1/prisma.yml
4.3. 停止 Prisma ORM 伺服器
最後,您可以停止執行您的 Prisma ORM 伺服器。